Category Archives: Uncategorized

Seamless Navigation in .NET MAUI Hybrid Apps – My .NET MAUI Hybrid Journey (part 1)

I’ve always wanted to build a native application with all the insight and expertise that I’ve accumulated in building web applications, it’s felt like a big jump for me to get into native mobile or desktop applications. A long time ago I used to build windows forms applications for my employer, and I haven’t worked a desktop application since.

With the advent of .NET MAUI and the ability to build Blazor applications for a website and share their pages and components for use in a native application felt like a real possibility for me. I haven’t really stepped into building and working working with this application model yet… until now.

This is the first of what I expect will be a series of blog posts describing things that I’ve discovered, challenges that I’ve overcome, and features as I migrate the TagzApp application to run as a native desktop application.

Menus – Not as Easy as They Look

The first feature that I wanted to bring over was going to be the layout of the application. In TagzApp I have a very simple layout with a header menu bar with a couple of options to allow you to navigate to other areas of the application. It’s not too complex but it felt like an easy piece to migrate over to the hybrid application.

In doing some research and thinking more about how I want to represent a menubar inside of a native application it felt like it made more sense to turn this into a native menubar and not an HTML menubar that lived inside of my Blazor application. I started doing some research about how to create a menubar in .NET MAUI and found a few examples that showed how to use a tab bar to create and use multiple BlazorWebView components to represent different sections of the application. This felt clumsy to me because it meant that I would be spinning up multiple browsers to run inside of my application just to access and work with other parts of the application. I knew that that would mean more resources used by the computer when this application is running, and that felt a little irresponsible for me as a developer.

I wanted to actually have a menu bar with items that you would click and it would navigate inside of my Blazor application. Looking at the documentation for the BlazorWebView, there is no direct access to the NavigationManager or an ability to reset the location of the browser component. I set about to make the NavigationManager inside of Blazor accessible to the .NET MAUI application.

In the demos on this post, I’ll start with the default Blazor Hybrid template application and turn the vertical NavBar element into a native menu. Completed source code for this sample is available on my GitHub. I also have recorded a video where I talk through this demo:

The default experience inside a Blazor Hybrid application with .NET 8

Configuring the Shell and Menu Items

To start with, I configured the App.xaml file to have a Shell embedded directly and contain the BlazorWebView for my application. This would allow me to add a Menubar to the Shell.

<Application.MainPage>
  <Shell>
    <ShellContent>
      <ShellContent.ContentTemplate>
        <DataTemplate>
          <ContentPage>
            <BlazorWebView x:Name="blazorWebView1" HostPage="wwwroot/index.html">
              <BlazorWebView.RootComponents>
                <RootComponent Selector="#app" ComponentType="{x:Type local:Components.Routes}" />
              </BlazorWebView.RootComponents>
            </BlazorWebView>
          </ContentPage>
        </DataTemplate>
      </ShellContent.ContentTemplate>
    </ShellContent>
  </Shell>
</Application.MainPage>

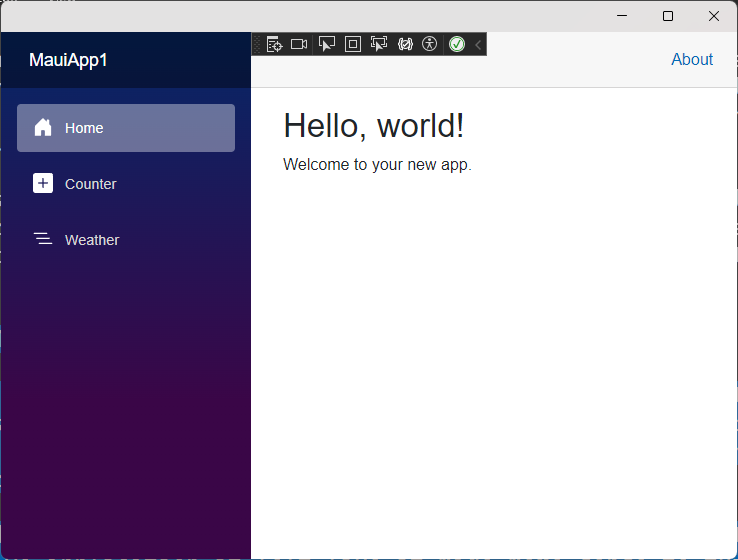
I also removed the call inside App.xaml.cs to set MainPage = new MainPage(); Since we’re specifying our own MainPage inside the XAML markup, there’s no need to instantiate another page. I could run the application now, and I’d get the same user experience as the previous image.

Ok.. next steps…

Adding a MenuBar component

In .NET MAUI, the MenuBar component is added when you introduce MenubarItems. No problem, I added a MenuBarItem and 3 MenuFlyoutItems for the 3 base pages inside the default application. This code was added just inside the ContentPage element in App.xaml

<ContentPage.MenuBarItems>
  <MenuBarItem Text="Content">
    <MenuFlyoutItem Text="Home" Clicked="MenuItem_Clicked"></MenuFlyoutItem>
    <MenuFlyoutItem Text="Counter" Clicked="MenuItem_Clicked"></MenuFlyoutItem>
    <MenuFlyoutItem Text="Weather" Clicked="MenuItem_Clicked"></MenuFlyoutItem>
  </MenuBarItem>
</ContentPage.MenuBarItems>

Notice that I set each of the menu items to trigger the same event, MenuItem_Clicked All of these menu items do the same thing, but vary in the location they target. We’ll write this method in a little bit, because we need to first make the NavigationManager available

Enabling the NavigationManager in .NET MAUI

The Blazor NavigationManager isn’t directly accessible in .NET MAUI. You can’t inject it or reach into the BlazorWebView and interact with it. Instead, we need to create a service that will allow us to capture the NavigationManager and interact with it. The curious part of this is that both parts of the application model, .NET MAUI and Blazor use the same dependency injection services. So…. we can exploit this to allow our service to be injected into both Blazor AND .NET MAUI.

No problem, I can whip up a little bit of code that allows both application models to work with the Blazor NavigationManager:

public class NavigatorService
{

  internal NavigationManager NavigationManager { get; set; }

}

I can then register this NavigatorService with the service locator in .NET MAUI with this line in the MauiProgram.cs file:

builder.Services.AddSingleton<NavigatorService>();

I want this Navigator service on every page in my Blazor application, so I’ll inject it and configure the NavigationManager we’ll use inside the MainLayout.razor file:

@inherits LayoutComponentBase
@inject MauiApp1.NavigatorService NavigatorService
@inject NavigationManager NavigationManager

<div class="page">
...
</div>

@code {

  protected override void OnInitialized()
  {

    NavigatorService.NavigationManager = NavigationManager;

  }

}

Finally, I’ll add the NavigatorService to my App.xaml.cs code so that it is injected and stored as a property for use later:

public partial class App : Application
{
  public App(NavigatorService navigatorService)
  {
    InitializeComponent();
    NavigatorService = navigatorService;
  }

  internal NavigatorService NavigatorService { get; }

  private void MenuItem_Clicked(object sender, EventArgs e)
  {
  }
}

Connecting and Navigating from the MenuBar

Now, we can use a switch statement to configure the navigation of the BlazorWebView. Let’s add that switch inside the Menuitem_Clicked method:

private void MenuItem_Clicked(object sender, EventArgs e)
{

  var menuItem = (MenuItem)sender;
  var url = menuItem.Text switch
  {
    "Counter" => "/counter",
    "Weather" => "/weather",
    _ => "/"
  };
  NavigatorService.NavigationManager.NavigateTo(url);

}
Application with the new MenuBar

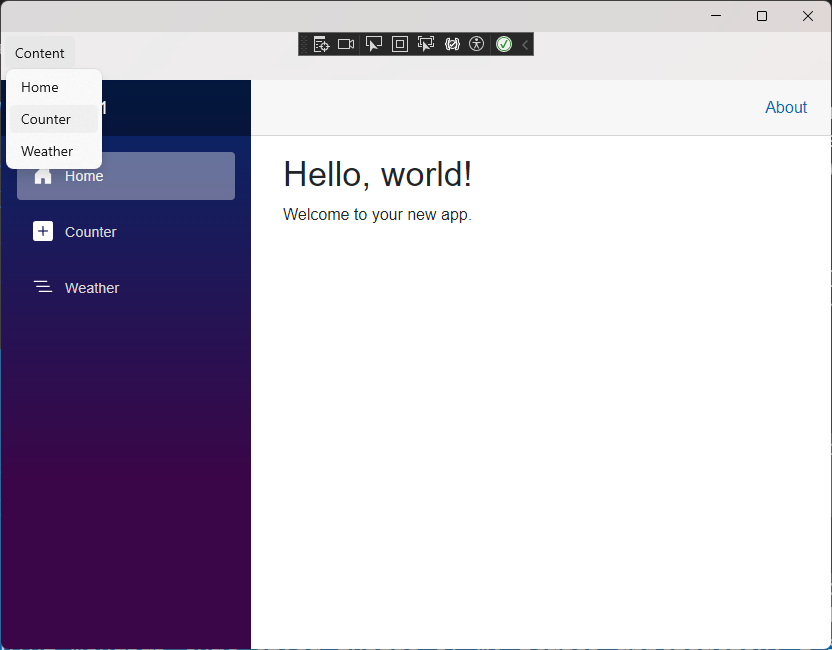
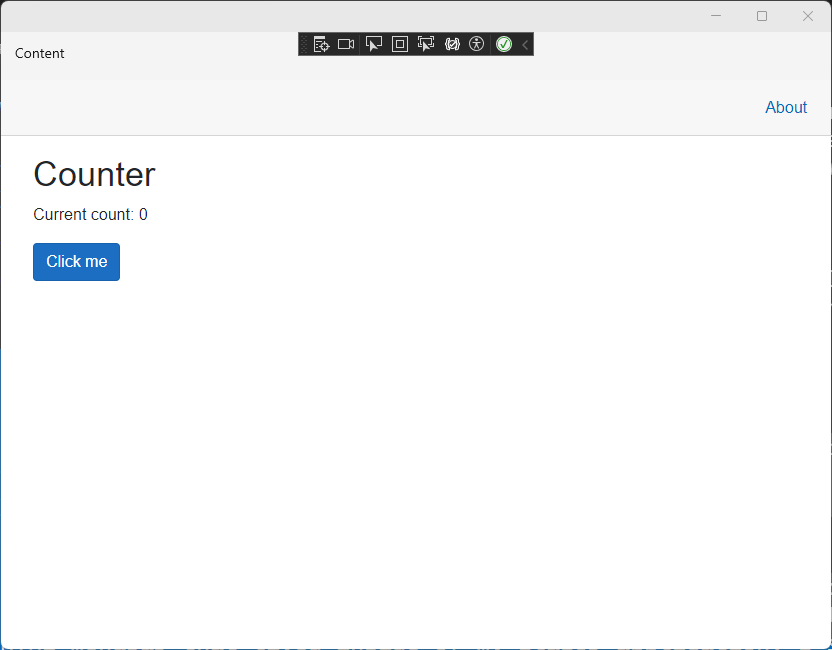
Now, when we click the various items in the native MenuBar, the browser navigates appropriately.

For completeness, I removed the side navigation from the MainLayout.razor file so that the application felt more native and didn’t have 2 MenuBars.

Summary

This is just one creative way to connect our Blazor application to .NET MAUI and reuse the code we’ve already built in Blazor. The complete source code for this sample is available on my GitHub. I’m working through an entire application for TagzApp, and will share more of my findings in the weeks ahead.

Have you tried using Blazor content in .NET MAUI, WPF, or Windows Forms? What was your experience? Let me know in the comments below

Lesson Pager on the C# in the Cards website

Blazor and .NET 8: How I Built a Fast and Flexible Website

I’ve been working on a new website for my series CSharp in the Cards. I built this website in a way that was easy to maintain, flexible and most importantly would respond quickly to requests from visitors.  I knew that Blazor with .NET 8 had a static server rendering feature and decided that I wanted to put it to the test. I recently published a new lesson to the website and included a web assembly component to allow for paging and filtering the list of lessons I was pleasantly surprised when I saw the performance dashboards on azure showing that it was handling requests and responding very very quickly.

Response times of C# in the Cards after the new episode

In this blog post, let’s talk about how I’ve optimized the website for speed and some of the finishing touches that you can put on your Blazor website to make it screaming fast running on a very small instance of Azure App Service.

Static Site Rendering – Its Blazor, but easier

With .NET 8 there’s a new render mode for Blazor and it’s called static site rendering or SSR. This new render mode ditches all interactivity that we previously had with Blazor server side and Blazor Web Assembly and instead favors delivering HTML and other content from the server to browsers in a high speed manner. We can bolt on other techniques that we know from SEO and website optimization to make this even faster and deliver a great experience for our visitors.

The About page is configured to output a bunch of HTML headers for the SEO folks and the social media pages to be able to present good information about the site.  Notice the headers that are added to satisfy the search engines:

  • a canonical link element that identifies where the page should be served from
  • a keywords meta element with information about what you can find here
  • a robots element that tells the search engine crawlers what they can do with the page
  • open graph and Twitter meta tags that instruct Twitter, Facebook, LinkedIn, Discord, and other sites about the images, titles, and description of the page

That’s fine… but there are two other features to notice:

  1. This is a static page with no data being presented.  I’ve tagged it on line 2 with an attribute to allow output caching for 600 seconds (10 minutes).  This way the web server doesn’t have to render a new copy when its requested within 10 minutes of a previous request.
  2. The images references are in webp format.  Let’s not overlook this super-compressed format for displaying high-quality images.  It might be 2024, but every bit we deliver over the network still matters for performance and the 600×600 portrait picture of myself on this page was compressed nicely:
Original Compressed # Difference
PNG WEBP
450kb 30kb -93.3%

93% savings…  that’s crazy good and means that your browser is not downloading an extra 420kb it doesn’t need.

Data is stored in static files on disk

For this simple website I don’t need a big fancy database like SQL Server or Postgres or even MySQL. For this site, I’ve stored all of the data in a simple CSV file on disk.  That means that I can edit the list of articles that are available and the metadata that goes with them by just opening the file in Excel and writing new content. This means that when it comes time for me to read data about the list of content that’s available I’m only reading from a very small file on disk and I don’t need to worry about any kind of contention. I also don’t need to worry about any service that’s running to deliver that data because it’s only coming out of a small file on disk that’s read only.

In this repository class I use the LinqToCSV library to open and read all of the content from the file into a Post object in the first method, GetPostsFromDisk.  Later, in a public method called GetPosts, you see where I use the in memory cache feature of ASP.NET Core to fetch data from the cache if its available or get it from disk and store it in cache for 30 minutes.  I could probably extend this timeout to several hours or even days since the website doesn’t get any new content without uploading a new version of the site.

The key here is that the meta data about the lessons on the site is loaded and kept in memory.  As of episode 9 of the series, the posts.csv file is only 1.4kb so I have no worries about loading its entire contents into memory.

Don’t forget, in order to add the MemoryCache to your ASP.NET Core application, you need to add this line to your site configuration in the Program.cs file:

builder.Services.AddMemoryCache();

I could add other cache options like Redis to the site, but with how small the data I want to cache is, I don’t need that sophistication at this point.

Pre-rendered Interactive Web Assembly Content is fast… REALLY fast

I wanted to add a subset of the lessons to the front page of the website so that you could see the latest six episodes in the video series and scroll back and forth to the other episodes. This should be an interactive component but I still wanted the home page to render quickly and have a fresh speedy response time as you page through and look at the various episodes that are available. The natural way to do this with Blazor is to build a web assembly component that will run on the client and render data as users click on the buttons for that collection of articles.

I wrote a simple pager component that would receive a collection of lesson data and render cards for each lesson.  Since we already know that the collection of lesson data is less than 2kb in size I don’t have a problem sending the entire collection of data into the browser to be rendered.


When I use the @rendermode attribute in this code, it forces the render mode to web assembly and ASP.NET will pre-render as well as cache a version of that component’s resultant HTML with the home page. After viewers download the Web Assembly content it will hand control over to web assembly and it will be a fully interactive component for them to be able to work with.

Lesson Pager on the C# in the Cards website

Lesson Pager on the C# in the Cards website

Blazor lets me build content to be rendered on the web and I get to choose where exactly it should run. It can run in the browser with web assembly it can run statically on the server it can run interactively on the server if I want it to. In this case running as web assembly gives a really nice usability effect that makes it easy for viewers to locate the content they want to watch.

Compress the Content from Kestrel

By default content that’s delivered from the ASP.NET kestrel web server is uncompressed. We can add brotli compression to the Web server and deliver content in a much smaller package to our visitors with just a few simple lines of code in program.cs. This is something that I think everybody should do with their Internet facing websites:

#if (!DEBUG)
builder.Services.AddResponseCompression(options =>
{
options.EnableForHttps = true;
});
#endif

Add response compression configures the server so that it will deliver broadly compressed content. In this application I wrap it with the conditional debug detection because hot reload does not work with compression enabled.  When we deliver the website to the production web host it will be running in release mode and compression will be enabled.

Optimize all the JavaScript and CSS

CSS AND JavaScript can be minified and combined to reduce the number and size of downloads for this static content that makes our websites look good.  For this website I installed and used the WebOptimizer package available on NuGet.  My configuration for this looks like the following:

This script bundles the CSS files that were delivered with my website template and minifies the one JavaScript file that I manage with my project.

Set long cache-control headers for static content

The last thing that I did was set long duration cash dash control headers for static content like images CSS and Javascript files. This is easy to do with just a few more lines of optional configuration when I configure the static file feature inside of ASP.NET Core:

Summary

This website’s been easy for me to build because I can rely on my normal HTML skills and the plethora of HTML templates and CSS libraries out there to make my website look good. Blazor helps me to make it interactive render quickly and grow as I add more content to it. my cost in interaction with azure is minimal, as I’m using a Basic-2 instance of Azure App Service running Linux to deliver this site.

KlipTok logo over a bar graph in a PDF

How to watermark, annotate, and digitally sign a PDF with IronPDF

Previously, I shared some code that demonstrated how the new PDF report feature was built for KlipTok.  In reviewing the feature, I wanted to give it a little more value.  When you read a report generated from KlipTok, I want you to know that it was genuine and accurate data.  I started researching the ability to stamp or put an authentic indicator into the report so you could tell it was a real report from KlipTok.  I found three techniques with IronPDF that were each amazingly easy to implement and gave different experiences when reading the PDF.  Let’s take a look at each technique: watermarks, annotations, and digital signatures. Continue reading

Fritz's Hat Collection Website

Learnings in Blazor Static Web Apps on Azure: Part 1

I’ve been a big fan of Blazor as a framework for web applications and the promise of being able to use my favorite programming language C# in the browser to build with web assembly. When Azure Static Apps released support for Blazor, I was immediately interested and started building a few applications. I’ve learned a few things about adding features to these applications and using other Azure services with a Blazor application and will share some of those tips and tricks in a series of blog posts over the next few weeks.

My first app: Fritz’s Hat Collection

I wanted to make a simple website to get started and learn more about using this application model, so I tackled a long desired website that I wanted to build: a catalog of my hat collection.  Yes, I enjoy a good hat particularly ball-caps and wanted to make a little site that was effectively a little more than an image gallery.  Maybe I would add some metadata and allow visitors to search the site.  The site is currently running at https://hats.csharpfritz.com

Continue reading

Streaming on the Road – Building a Studio Edition

Last week, I had the pleasure of producing the Twitch stream for the DEVintersection conference in Las Vegas. This is a tremendous event that the Microsoft .NET, Visual Studio, and Azure teams as well as the Google Angular team speak at. I brought my travel streaming rig to the MGM Grand and built a studio with a backdrop, lighting, and some extra large monitors. In this post, I’ll walk you through the preparation of that physical space in a series of photos.

Continue reading