I’ve been excited to use the Elgato Stream Deck for about a year now, after much encouragement from other streamers to check it out. Now, I can’t speak more highly of the effectiveness and placement of this device in my arsenal of tools as a streamer. Its my MUST have device when I stream, and I bring it everywhere on the road with me to simplify my process. In this post, I’ll give you the quick run-down about what the Stream Deck is, why it’s so important, and some of the tricks that I’ve configured.
What is the Stream Deck?
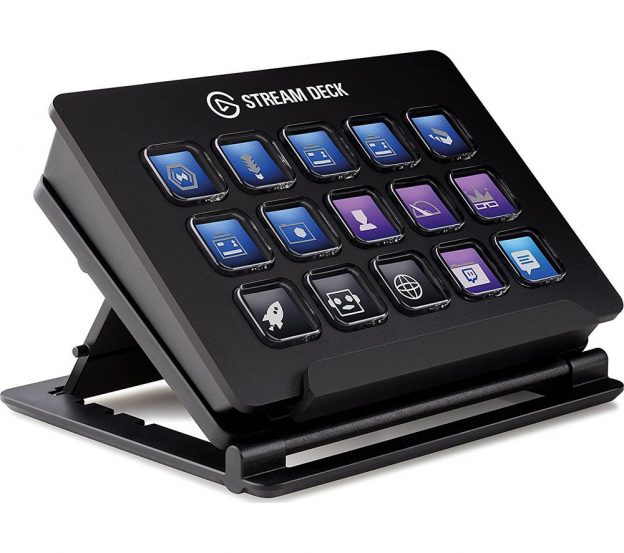
The Stream Deck is a small programmable external keyboard with LCD buttons that comes with an initial configuration to help live-video streamers run their shows without having to change applications, type, or move their mouse. The device communicates with an application that runs on Mac or Windows and automates interaction with Open Broadcaster Software (OBS), XSplit, plays sounds, launches applications, sends key strokes, and interacts with services like Twitter, Twitch, Mixer, and YouTube.
For running my stream, its invaluable. I want to be able to focus on my chat room and writing code. When I need to change scenes, play music, activate or deactivate microphones, or drop in the goofy sound effect, I just don’t want to use my mouse to locate the right application and interact with it. Let’s automate ALL of those repetitive tasks and wire them up to a Stream Deck button so that everything is a button-press away and I can stay focused on the stream.
Tricks of the Streamer
The top questions that I have been getting recently have been: How’d you do that so quickly? You changed your Twitter name and started your stream all at the same time, how does that work? Your stream looks so good, what is your secret.
The answer too all of these questions is simple: I use the Stream Deck. Let’s take a look at some of the buttons that I have configured.
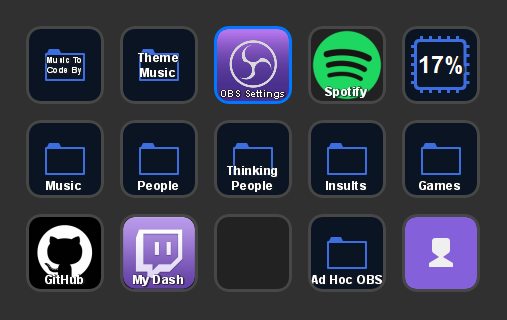
My home screen on the Stream Deck is simple, and its a jump off point to the various segments of my stream. All of the things I need to start the show run from here, with a focus on the center column. There are folders configured for my music, various sound effects, and the big purple button at the top that leads to my OBS management tools. I purposely put this button in the top and middle so that I can easily find it without looking at the device. The Spotify button launches Spotify, because I want to be able to run Spotify when my show is over 🙂
The top right button shows the current CPU utilization of my PC, EXTREMELY handy when trying to determine why Visual Studio or OBS is misbehaving. The bottom row contains buttons to launch a browser and navigate to my GitHub page and my Twitch Dashboard. The bottom right button is a status indicator, showing me how many viewers I currently have on Twitch.
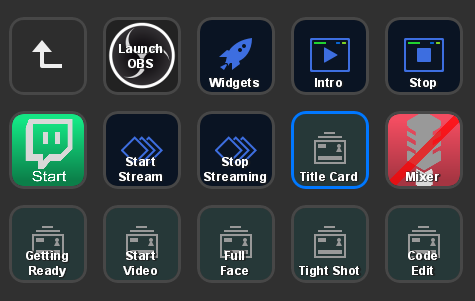
Let’s look at something more interesting, managing OBS from the Stream Deck. Top row, I have buttons that launch OBS and start my widgets that I host on screen. The widgets are an ASP.NET Core application that run inside of a Docker container on my local machine. Both of these buttons launch applications using the standard Stream Deck “Open Application” action, with the widgets launching a batch file that configures and starts the container.
The top right two buttons start my Intro music and Stop all sounds played from the Stream Deck. The built-in audio player in the application is pretty good, and I have no complaints about it at all. I love being able to see exactly how much time is left in a song or sound effect when I press the button to play it, and the stream deck shows a nice animation with the time left:
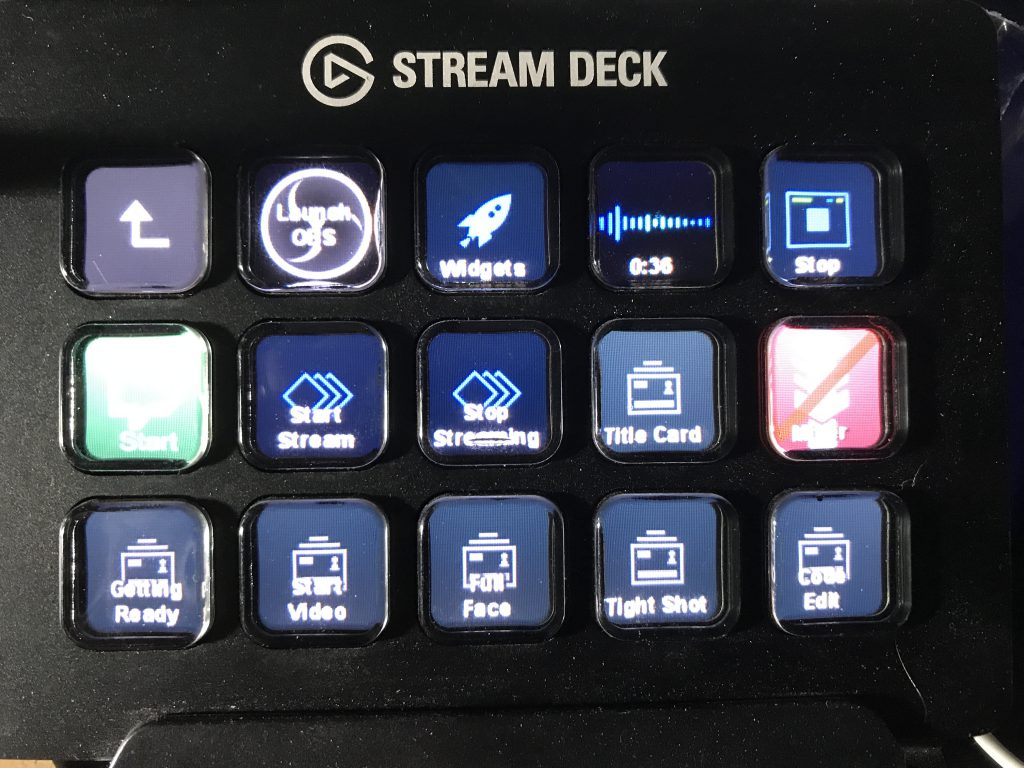
The middle row of this screen is the start and stop of my stream. The leftmost button starts and stops the stream using the OBS Stream action. I’ve modified the button using the Stream Deck Key Creator online application to make it green or red depending on the state of the stream. When I’m offline, the button is green with the label “Start” and when I’m actively streaming the button turns red with the label “Stop”. Oh yeah… buttons have state and can show different images on the device. Here is my configuration for this button:
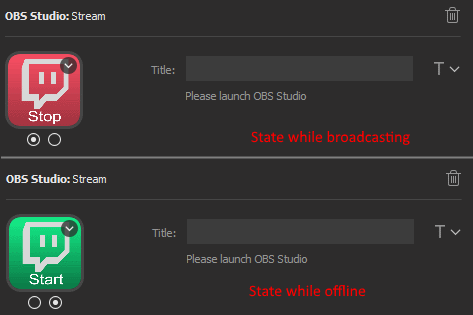
That’s easy… simple… just set up a pair of images on the buttons by dragging the image onto the button on the left side and the software sets it. Piece of cake. Let’s look at the next two buttons where the REAL fun begins with Multi-Actions:
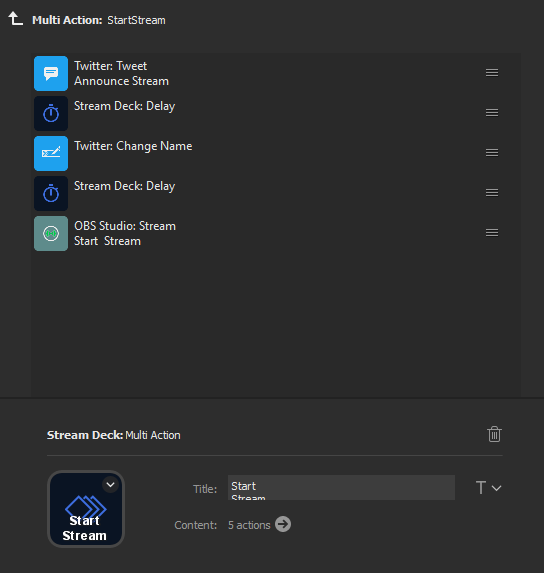
I’m just recently started using Multi-Actions, and the automation here is amazing. This is one button, but can trigger the actions of any other button. Previously, I had these actions on other buttons… but now I no longer need that because I can send the Twitter message to announce my stream, change my profile name, and start the OBS stream all on one button. I added a 500ms delay between each step just to ensure that the automation completes properly and because I’m a little paranoid.
The next button, “Stop Streaming” does just the opposite of this button, resetting my Twitter name and stopping the stream process from OBS.
The next button is my ‘Title Card’ that you almost NEVER see on stream, and its a scene in OBS that just has the name of my show. The button lights up when the OBS scene is active, and is dim (as seen in this image) when inactive.
The final button on this row is a mute / unmute button for my sound mixer feed in OBS. Once again, I customized this button using the Stream Deck Key Creator application so that its really easy to see the state of my audio-output. Green when my microphone is hot, red when it is muted. I mute this whenever I am not streaming so that I do not accidentally have sound go out to Twitch. Hmm… maybe I should add that to my “Stop Streaming” multi-action.
The bottom row are all scenes in OBS, allowing me to change the appearance of the video that I am presenting. Easy stuff… nothing impressive there.
Simplifying Production for a 24 Hour Event
Running the Stream Deck with this configuration works for ME… what about setting it for a team of hosts, to run a non-stop event for 24 hours, who have never streamed before? Oh yeah, I pulled it off… .NET Conf 2018 was produced and run from Microsoft’s Channel 9 Studio C for 24 hours straight, and the Stream Deck ran it ALL.
We had 24 speakers present, configurations for each speaker to take over OBS with an intro video, camera configuration, nameplate, and a 5 minute commercial video. This is a LOT of content to juggle, and we made it work with a team of 8 hosts who all were trained to use a simplified Stream Deck configuration.
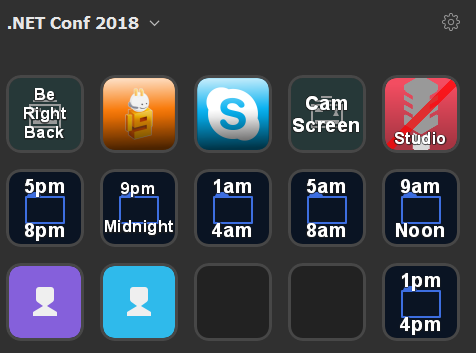
Here’s how it worked: we had a rescue title slide on the top left button for “Be Right Back” in case there were any technical issues… and we had one or two during the marathon production.
The next two buttons with the Channel 9 logo and the Skype logo were isolated camera shots from either the studio or the remote presented connected with Skype.
The Cam-Screen button would allow us to have both cameras active so that you could have a conversation with both parties visible.
The final button on the top is the audio mute for the in-studio microphones.
The buttons with the times on them are folders of additional buttons with the individual configurations for each hour of the event. The bottom left buttons are status indicators showing how many viewers were watching on Twitch (in purple) and Mixer (in blue)
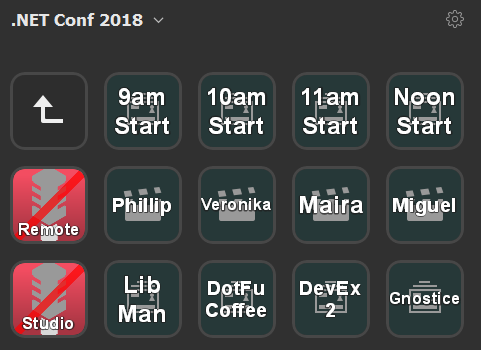
Each of the buttons collections for an hour of presentation looked like the above. The leftmost buttons allow control of the remote guest’s microphone and the in-studio microphones. Each column of buttons was assigned to work together. At 10am, we pushed the 10am Start button that played an intro video scene in OBS and automatically transitioned to the Skype feed with Veronika’s nameplate showing. We would chat with Veronika to introduce her then mute the in-studio microphone and hide her nameplate by pushing the middle button with her name on it. Finally, when the hour was up we would turn the in-studio microphone back on, thank the speaker and cue the 5 minute bumper video on the bottom row.
It worked beautifully, and the hosts really enjoyed working with the device, as it made their job of switching and organizing the guests MUCH easier.
Summary
This is just the TIP of the iceberg for uses of the Stream Deck. I’ve heard folks configure all kinds of hot keys and applications to launch. I’ve seen folks automate the placement of videos, cutting between scenes with a timer and hiding video elements to create some really cool effects on stream. Have you got a Stream Deck? What are YOUR favorite tricks? Let me know in the comments below, and I’ll see you on Twitch