I was working on a web application over the weekend and I needed to add a feature that would allow images to be uploaded by end-users. As we all know, we should never trust content uploaded by anonymous ‘friends’ on the internet. I wanted to add malware scanning to my project, but how? In this article, I introduce a proof-of-concept project that adds the open source ClamAV antivirus scanner to a .NET Aspire system and shares connection information so that other resources can request malware scans.
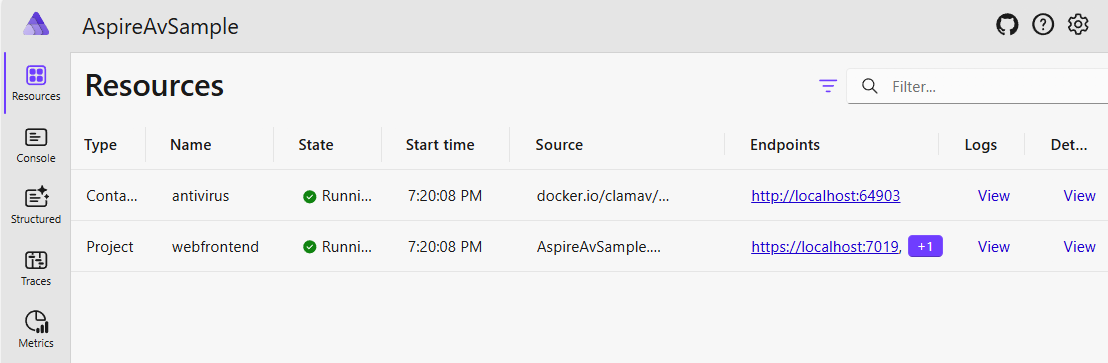
ClamAV publishes a self-maintaining docker container that updates itself with latest malware definitions. We know that containers can be added to a .NET Aspire project, so I wrote a quick resource that shared an HttpEndpoint:
Now we’re talking! We can now reference a ClamAV container resource easily in our .NET Aspire AppHost project and pass it to our website like this:
We can now scan our uploaded files with the nClam library like this:
That’s pretty easy to get started with… and there’s a lot more that we can do with this to help make our public file uploads secure by default.
Get the Code!
I’ve published my sample code, showing a Blazor application uploading files to a minimal API endpoint where ClamAV inspects the content and reports back whether malware was detected. You can find it on my GitHub at https://github.com/csharpfritz/AspireAntivirus
What do you think? Is this something that I should spend some more time wrapping and making easier to use? Create an issue on the GitHub repository if there’s something I can improve or a comment below to let me know what you think.
I’ve always wanted to build a native application with all the insight and expertise that I’ve accumulated in building web applications, it’s felt like a big jump for me to get into native mobile or desktop applications. A long time ago I used to build windows forms applications for my employer, and I haven’t worked a desktop application since.
With the advent of .NET MAUI and the ability to build Blazor applications for a website and share their pages and components for use in a native application felt like a real possibility for me. I haven’t really stepped into building and working working with this application model yet… until now.
This is the first of what I expect will be a series of blog posts describing things that I’ve discovered, challenges that I’ve overcome, and features as I migrate the TagzApp application to run as a native desktop application.
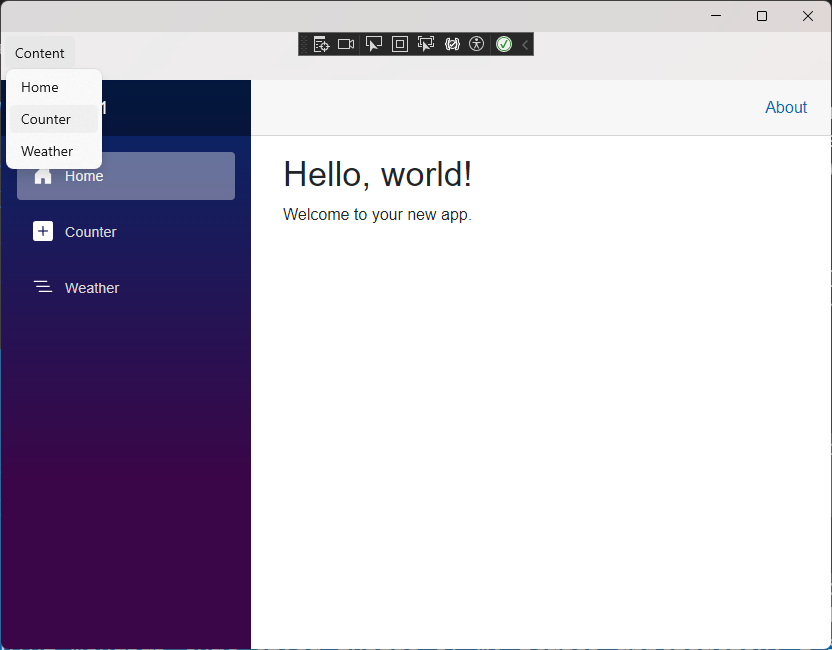
Menus – Not as Easy as They Look
The first feature that I wanted to bring over was going to be the layout of the application. In TagzApp I have a very simple layout with a header menu bar with a couple of options to allow you to navigate to other areas of the application. It’s not too complex but it felt like an easy piece to migrate over to the hybrid application.
In doing some research and thinking more about how I want to represent a menubar inside of a native application it felt like it made more sense to turn this into a native menubar and not an HTML menubar that lived inside of my Blazor application. I started doing some research about how to create a menubar in .NET MAUI and found a few examples that showed how to use a tab bar to create and use multiple BlazorWebView components to represent different sections of the application. This felt clumsy to me because it meant that I would be spinning up multiple browsers to run inside of my application just to access and work with other parts of the application. I knew that that would mean more resources used by the computer when this application is running, and that felt a little irresponsible for me as a developer.
I wanted to actually have a menu bar with items that you would click and it would navigate inside of my Blazor application. Looking at the documentation for the BlazorWebView, there is no direct access to the NavigationManager or an ability to reset the location of the browser component. I set about to make the NavigationManager inside of Blazor accessible to the .NET MAUI application.
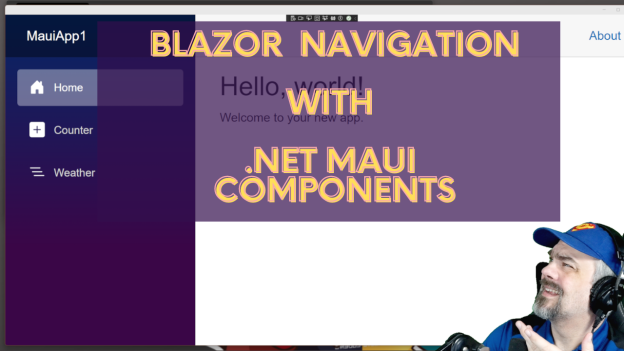
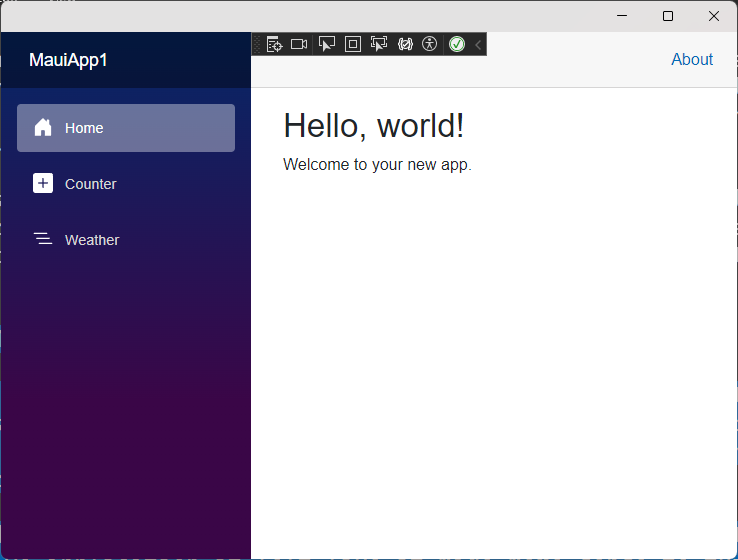
In the demos on this post, I’ll start with the default Blazor Hybrid template application and turn the vertical NavBar element into a native menu. Completed source code for this sample is available on my GitHub. I also have recorded a video where I talk through this demo:
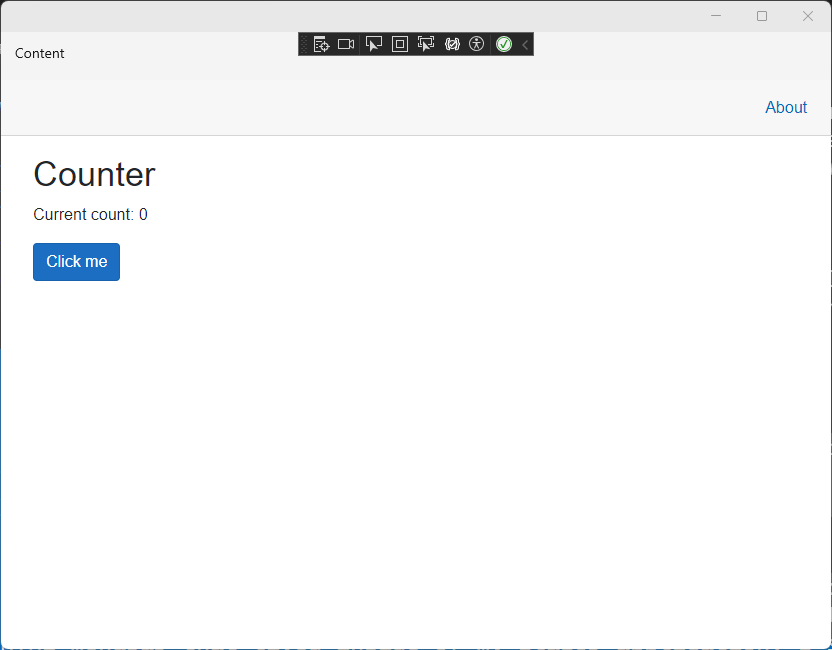
The default experience inside a Blazor Hybrid application with .NET 8
Configuring the Shell and Menu Items
To start with, I configured the App.xaml file to have a Shell embedded directly and contain the BlazorWebView for my application. This would allow me to add a Menubar to the Shell.
I also removed the call inside App.xaml.cs to set MainPage = new MainPage(); Since we’re specifying our own MainPage inside the XAML markup, there’s no need to instantiate another page. I could run the application now, and I’d get the same user experience as the previous image.
Ok.. next steps…
Adding a MenuBar component
In .NET MAUI, the MenuBar component is added when you introduce MenubarItems. No problem, I added a MenuBarItem and 3 MenuFlyoutItems for the 3 base pages inside the default application. This code was added just inside the ContentPage element in App.xaml
Notice that I set each of the menu items to trigger the same event, MenuItem_Clicked All of these menu items do the same thing, but vary in the location they target. We’ll write this method in a little bit, because we need to first make the NavigationManager available
Enabling the NavigationManager in .NET MAUI
The Blazor NavigationManager isn’t directly accessible in .NET MAUI. You can’t inject it or reach into the BlazorWebView and interact with it. Instead, we need to create a service that will allow us to capture the NavigationManager and interact with it. The curious part of this is that both parts of the application model, .NET MAUI and Blazor use the same dependency injection services. So…. we can exploit this to allow our service to be injected into both Blazor AND .NET MAUI.
No problem, I can whip up a little bit of code that allows both application models to work with the Blazor NavigationManager:
public class NavigatorService
{

  internal NavigationManager NavigationManager { get; set; }

}
I can then register this NavigatorService with the service locator in .NET MAUI with this line in the MauiProgram.cs file:
I want this Navigator service on every page in my Blazor application, so I’ll inject it and configure the NavigationManager we’ll use inside the MainLayout.razor file:
Now, when we click the various items in the native MenuBar, the browser navigates appropriately.
For completeness, I removed the side navigation from the MainLayout.razor file so that the application felt more native and didn’t have 2 MenuBars.
Summary
This is just one creative way to connect our Blazor application to .NET MAUI and reuse the code we’ve already built in Blazor. The complete source code for this sample is available on my GitHub. I’m working through an entire application for TagzApp, and will share more of my findings in the weeks ahead.
Have you tried using Blazor content in .NET MAUI, WPF, or Windows Forms? What was your experience? Let me know in the comments below
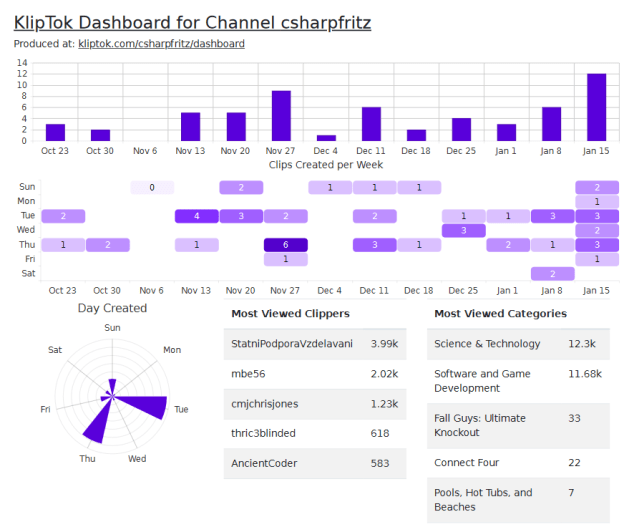
An important goal for me in building the KlipTok web application is to be able to deliver reports that can be downloaded and referenced by streamers and their support teams to help them learn how to grow their online presence. I investigated a few tools and landed on IronPDF and started building an initial and simple report showing the dashboard content from KlipTok. In this post, I’m going to show you how I took a Blazor Web Assembly page and re-used it so that the content could be printed with IronPDF. Continue reading →
I’ve written and used a lot of the Azure Storage service to work with applications that I’ve built that run in the cloud. It’s easy enough to use, just throw some files in there and they can be served internally to other applications or you can let the public access them remotely.
Something that always struck me about the public access to the service was that the content was never cached, never compressed, and in general felt like a simple web server delivering content without some of those features that we REALLY like about the modern web. Adding cache headers and compressing the content will reduce the number of queries to the server and the bandwidth needed to deliver the content when it is requested.
In this post, I’m going to show you how I activated caching and compression for an Azure Storage blob cache that I wanted to use with my web application KlipTok.
I’ve been tinkering and preparing to build a mobile app for the KlipTok website for the past few months. KlipTok is a personal project, and a joy to work on when I have an hour here and there to spend on the site. The most requested feature I have, is for a mobile app to complement the site, and this week I started focusing on that effort… and was even able to build an Android app using .NET MAUI, Blazor, and my Linux laptop. In this post, I’ll describe how I went about getting the development environment working on Ubuntu Linux.
NOTE: Your experience might be different
Every Linux system is different, and I can point you in the direction that worked for me. I cannot guarantee that you will find similar success or answer questions for your configuration.
I started this project on my Twitch stream on Friday December 2nd, and was able to get a simple Blazor MAUI application that played a Twitch clip running on my Windows machine. I used Visual Studio 2022 and the Android emulator that came with it and was happy to have an initial proof-of-concept application running.
I prefer to use my Linux laptop from KFocus when I am not in my home office. It’s a great machine with plenty of power for development. With a quick web search, I found an article where someone was setting up Android development on Linux. I read through those steps, updated to .NET 7, and wrote a few scripts to help with my development. Here’s what I did:
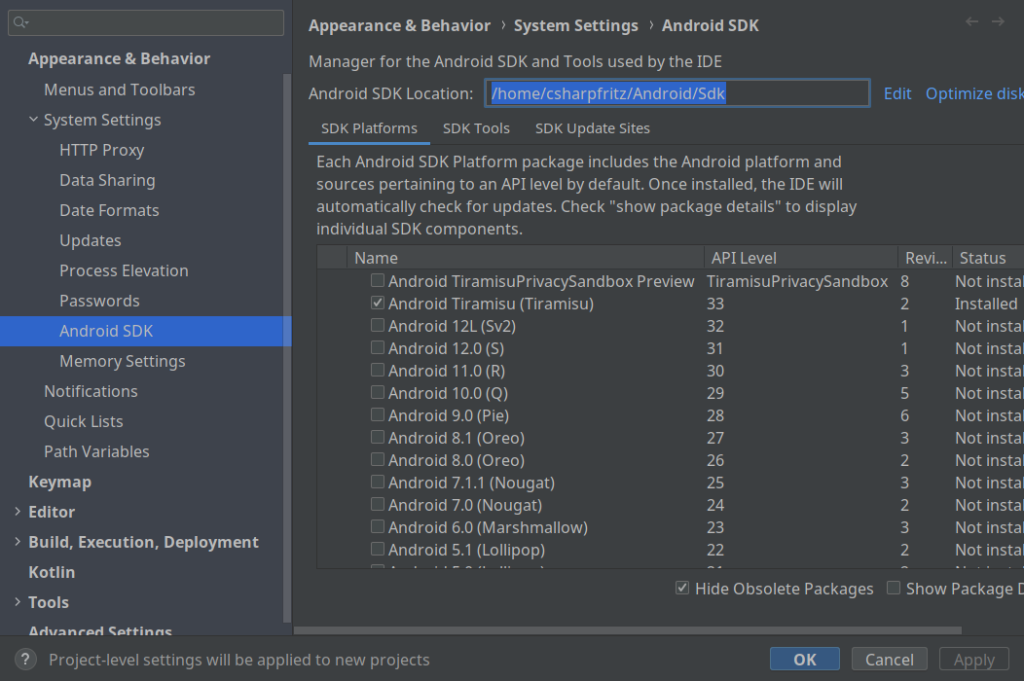
I installed Android Studio from the Ubuntu app repository using the Discover app.
I opened Android Studio and grabbed the SDK folder from the Android SDK Manager tool, depicted below. In my case, its sitting in /home/csharpfritz/Android/Sdk.
Installed the .NET MAUI workload into .NET 7 at the command-line with the command: `sudo dotnet workload install maui-android`
Installed the Android Debug Bridge (ADB) with `sudo apt install adb`
Started and ran the emulator from Android Studio, verifying that it was running with `adb devices`
Now that I have the emulator running, I could build and deploy my application to the emulator with the command:
On first test, it failed miserably and complained about not supporting MacCatalyst and iOS development on Linux. Not a problem, so I updated the csproj file to have supported frameworks like the following:
When I now build on Linux, just the Android configuration runs. I tried to recompile and got errors about the compiler not finding the Java jar tool. Easy enough, I installed the latest tool with this command:
sudo apt install openjdk-11-jdk-headless
I compiled and was able to deploy to the emulator in 55 seconds! Progress!
Last steps, I wanted to get the app building and recompiling with dotnet watch. This way, I can make changes and the app will reflect those changes in the emulator. My dotnet watch command is:
I found that the app didn’t rebuild and deploy when I made changes to the razor files. Easy enough, I made another addition to my csproj file to include a definition for watching the razor files:
With this patched, I was able to build and run the app in watch mode. As I changed razor files, the app would redeploy to the emulator in 6 seconds! That’s such a better development experience. Last thing that I tried, was to add a switch to my script to shut off the analyzers when I’m in watch mode:
That didn’t give me a big boost in performance, but I feel better without the analyzers running when I’m in watch mode.
Have you tried building an Android app on Linux with MAUI? Do you have any tips or tricks for developers to use in order to have a better experience? Share with us in the comments below