.NET Aspire and Antivirus

Adding Antivirus to .NET Aspire Systems

I was working on a web application over the weekend and I needed to add a feature that would allow images to be uploaded by end-users. As we all know, we should never trust content uploaded by anonymous ‘friends’ on the internet. I wanted to add malware scanning to my project, but how? In this article, I introduce a proof-of-concept project that adds the open source ClamAV antivirus scanner to a .NET Aspire system and shares connection information so that other resources can request malware scans.

The idea

I stumbled on a medium article by Jeroen Verhaeghe where the ClamAV antivirus scanner was introduced in combination with the nClam library from Ryan Hoffman.  Jeroen shows us how the ClamAV scanner can be run in a Docker container, and in reading that I thought – why not let .NET Aspire manage the container and its communications for us?

The Proof of Concept Code

ClamAV publishes a self-maintaining docker container that updates itself with latest malware definitions. We know that containers can be added to a .NET Aspire project, so I wrote a quick resource that shared an HttpEndpoint:

Now we’re talking! We can now reference a ClamAV container resource easily in our .NET Aspire AppHost project and pass it to our website like this:

.NET Aspire Dashboard showing the ClamAV antivirus resource

We can now scan our uploaded files with the nClam library like this:

That’s pretty easy to get started with… and there’s a lot more that we can do with this to help make our public file uploads secure by default.

Get the Code!

I’ve published my sample code, showing a Blazor application uploading files to a minimal API endpoint where ClamAV inspects the content and reports back whether malware was detected. You can find it on my GitHub at https://github.com/csharpfritz/AspireAntivirus

What do you think? Is this something that I should spend some more time wrapping and making easier to use? Create an issue on the GitHub repository if there’s something I can improve or a comment below to let me know what you think.

Seamless Navigation in .NET MAUI Hybrid Apps – My .NET MAUI Hybrid Journey (part 1)

I’ve always wanted to build a native application with all the insight and expertise that I’ve accumulated in building web applications, it’s felt like a big jump for me to get into native mobile or desktop applications. A long time ago I used to build windows forms applications for my employer, and I haven’t worked a desktop application since.

With the advent of .NET MAUI and the ability to build Blazor applications for a website and share their pages and components for use in a native application felt like a real possibility for me. I haven’t really stepped into building and working working with this application model yet… until now.

This is the first of what I expect will be a series of blog posts describing things that I’ve discovered, challenges that I’ve overcome, and features as I migrate the TagzApp application to run as a native desktop application.

Menus – Not as Easy as They Look

The first feature that I wanted to bring over was going to be the layout of the application. In TagzApp I have a very simple layout with a header menu bar with a couple of options to allow you to navigate to other areas of the application. It’s not too complex but it felt like an easy piece to migrate over to the hybrid application.

In doing some research and thinking more about how I want to represent a menubar inside of a native application it felt like it made more sense to turn this into a native menubar and not an HTML menubar that lived inside of my Blazor application. I started doing some research about how to create a menubar in .NET MAUI and found a few examples that showed how to use a tab bar to create and use multiple BlazorWebView components to represent different sections of the application. This felt clumsy to me because it meant that I would be spinning up multiple browsers to run inside of my application just to access and work with other parts of the application. I knew that that would mean more resources used by the computer when this application is running, and that felt a little irresponsible for me as a developer.

I wanted to actually have a menu bar with items that you would click and it would navigate inside of my Blazor application. Looking at the documentation for the BlazorWebView, there is no direct access to the NavigationManager or an ability to reset the location of the browser component. I set about to make the NavigationManager inside of Blazor accessible to the .NET MAUI application.

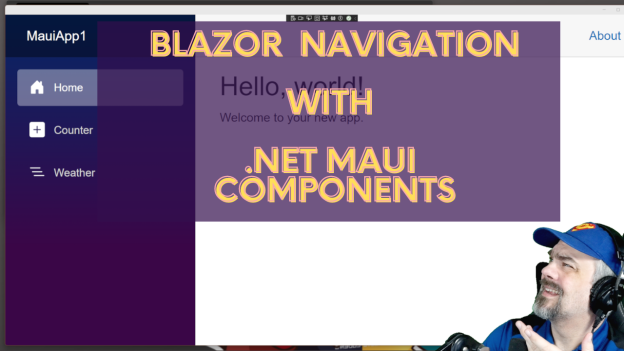
In the demos on this post, I’ll start with the default Blazor Hybrid template application and turn the vertical NavBar element into a native menu. Completed source code for this sample is available on my GitHub. I also have recorded a video where I talk through this demo:

The default experience inside a Blazor Hybrid application with .NET 8

Configuring the Shell and Menu Items

To start with, I configured the App.xaml file to have a Shell embedded directly and contain the BlazorWebView for my application. This would allow me to add a Menubar to the Shell.

<Application.MainPage>
  <Shell>
    <ShellContent>
      <ShellContent.ContentTemplate>
        <DataTemplate>
          <ContentPage>
            <BlazorWebView x:Name="blazorWebView1" HostPage="wwwroot/index.html">
              <BlazorWebView.RootComponents>
                <RootComponent Selector="#app" ComponentType="{x:Type local:Components.Routes}" />
              </BlazorWebView.RootComponents>
            </BlazorWebView>
          </ContentPage>
        </DataTemplate>
      </ShellContent.ContentTemplate>
    </ShellContent>
  </Shell>
</Application.MainPage>

I also removed the call inside App.xaml.cs to set MainPage = new MainPage(); Since we’re specifying our own MainPage inside the XAML markup, there’s no need to instantiate another page. I could run the application now, and I’d get the same user experience as the previous image.

Ok.. next steps…

Adding a MenuBar component

In .NET MAUI, the MenuBar component is added when you introduce MenubarItems. No problem, I added a MenuBarItem and 3 MenuFlyoutItems for the 3 base pages inside the default application. This code was added just inside the ContentPage element in App.xaml

<ContentPage.MenuBarItems>
  <MenuBarItem Text="Content">
    <MenuFlyoutItem Text="Home" Clicked="MenuItem_Clicked"></MenuFlyoutItem>
    <MenuFlyoutItem Text="Counter" Clicked="MenuItem_Clicked"></MenuFlyoutItem>
    <MenuFlyoutItem Text="Weather" Clicked="MenuItem_Clicked"></MenuFlyoutItem>
  </MenuBarItem>
</ContentPage.MenuBarItems>

Notice that I set each of the menu items to trigger the same event, MenuItem_Clicked All of these menu items do the same thing, but vary in the location they target. We’ll write this method in a little bit, because we need to first make the NavigationManager available

Enabling the NavigationManager in .NET MAUI

The Blazor NavigationManager isn’t directly accessible in .NET MAUI. You can’t inject it or reach into the BlazorWebView and interact with it. Instead, we need to create a service that will allow us to capture the NavigationManager and interact with it. The curious part of this is that both parts of the application model, .NET MAUI and Blazor use the same dependency injection services. So…. we can exploit this to allow our service to be injected into both Blazor AND .NET MAUI.

No problem, I can whip up a little bit of code that allows both application models to work with the Blazor NavigationManager:

public class NavigatorService
{

  internal NavigationManager NavigationManager { get; set; }

}

I can then register this NavigatorService with the service locator in .NET MAUI with this line in the MauiProgram.cs file:

builder.Services.AddSingleton<NavigatorService>();

I want this Navigator service on every page in my Blazor application, so I’ll inject it and configure the NavigationManager we’ll use inside the MainLayout.razor file:

@inherits LayoutComponentBase
@inject MauiApp1.NavigatorService NavigatorService
@inject NavigationManager NavigationManager

<div class="page">
...
</div>

@code {

  protected override void OnInitialized()
  {

    NavigatorService.NavigationManager = NavigationManager;

  }

}

Finally, I’ll add the NavigatorService to my App.xaml.cs code so that it is injected and stored as a property for use later:

public partial class App : Application
{
  public App(NavigatorService navigatorService)
  {
    InitializeComponent();
    NavigatorService = navigatorService;
  }

  internal NavigatorService NavigatorService { get; }

  private void MenuItem_Clicked(object sender, EventArgs e)
  {
  }
}

Connecting and Navigating from the MenuBar

Now, we can use a switch statement to configure the navigation of the BlazorWebView. Let’s add that switch inside the Menuitem_Clicked method:

private void MenuItem_Clicked(object sender, EventArgs e)
{

  var menuItem = (MenuItem)sender;
  var url = menuItem.Text switch
  {
    "Counter" => "/counter",
    "Weather" => "/weather",
    _ => "/"
  };
  NavigatorService.NavigationManager.NavigateTo(url);

}
Application with the new MenuBar

Now, when we click the various items in the native MenuBar, the browser navigates appropriately.

For completeness, I removed the side navigation from the MainLayout.razor file so that the application felt more native and didn’t have 2 MenuBars.

Summary

This is just one creative way to connect our Blazor application to .NET MAUI and reuse the code we’ve already built in Blazor. The complete source code for this sample is available on my GitHub. I’m working through an entire application for TagzApp, and will share more of my findings in the weeks ahead.

Have you tried using Blazor content in .NET MAUI, WPF, or Windows Forms? What was your experience? Let me know in the comments below

From IoT to the Cloud: A .NET Ecosystem Showcase with GitHub, Raspberry Pi, and Azure

As part of a demo to show a complete interconnected .NET ecosystem from IoT to the Cloud, I assembled a demo with the following components:

Raspberry Pi 3b (ARM32 processor, Wifi, 4GB RAM)
Touchscreen case from SmartPi-Touch
Azure Container Registry
– GitHub Repository
– GitHub action
– Docker
– Docker-Compose
– .NET 7 / ASP.NET Core / SignalR Core

The goal of this demo is to show how a connected IoT device, a Raspberry Pi, can run unattended and receive automatic updates from GitHub, Azure, refresh .NET content on a screen with no interruptions.

Prior to writing the software for this demo, I followed all of the instructions for the touch-screen and mounted the Raspberry Pi inside the case it provides.  This allows me to connect a keyboard and mouse as well as a power cable and work on the Raspberry Pi as a typical desktop workstation.

Note: This blog post are the notes from my construction of this demo.  I typically present and show this content on-stage and it is easily my most complex demo with moving pieces on a Raspberry Pi device that I show in my hands, Azure Container Registry, GitHub Codespaces and GitHub actions.  To make the demo a little more interesting, I’ll update some CSS (sometimes suggested by the audience) in the GitHub repository using GitHub codespaces on stage and the Raspberry Pi will update with the new look automatically.  I’d like to record a video showing this demo and update this post with a link to that demo

Step 0: Configure an Azure Container Registry

I already have one of these at `fritzregistry.azurecr.io`. It was easy enough to configure and deploy with credentials required to access the content.  Alternatively, you can also use the GitHub package repository features and store containers there.

Step 1: Configured Docker on the Raspberry Pi

These instructions originally appeared at: https://raspberrytips.com/docker-on-raspberry-pi/

On the Raspberry Pi, I downloaded Docker with this command when running as root:

curl -sSL https://get.docker.com | sh

I then added myself to the `docker` group by running this as my standard user `jfritz`:

sudo usermod -aG docker $USER

To get connected with the Azure registry, I logged in with this command and specified the registry name, the user id and password displayed on the Access Keys panel:
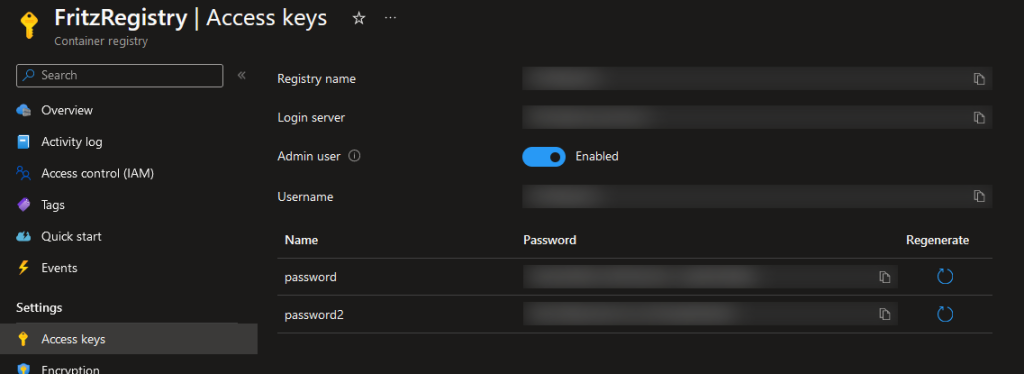
Azure Portal and identifying the Access Keys for a container registry

Azure Portal and identifying the Access Keys for a container registry

I could then login to the registry with these credentials on my Raspberry Pi by executing

docker login

This generated a `/home/.docker/config.json` file that will be used to login to my private Azure registry.

Step 2: Configured Docker-compose

For this system, I want to use Watchtower to monitor the container registry and install updates automatically.  In order to configure this with those dependencies, I needed Docker-componse. The prerequisites for Docker-Compose are installed with these commands:

sudo apt-get install libffi-dev libssl-dev
sudo apt install python3-dev
sudo apt-get install -y python3 python3-pip

I completed the installation of Docker-Compose with a pip3 install command:

sudo pip3 install docker-compose

Step 3: Configure Watchtower

Watchtower is a container that will watch other containers and gracefully update them when updates are available. I grabbed the watchtower image for ARM devices using this docker command on the Raspberry Pi:

docker pull containrrr/watchtower:armhf-latest

I built a `docker-compose.yml` file with my desired watchtower configuration:

The `command` argument instructs watchtower to check for updated images every 30 seconds, and the `restart` argument instructs the container to start at startup and always restart when the watchtower stops.  More details about how to configure a Docker-compose file are available in their documentation.

Step 4 : Customize the Dockerfile to build for ARM32

The device I have for this scenario is a Raspberry Pi 3B and has an ARM32 processor.  That can throw a little wrinkle into things because most systems now target ARM64 processors by default.  Not a problem, because there is still support for ARM32 available and we just need to specify it in our deployment scripts.

The application that I will be running on the device is a simple ASP.NET Core application that counts the number of times the screen has been touched.  In a more complete scenario, there might be a sensor connected or some kiosk screen wired up that presents information and collects data.

I wrote a Dockerfile for ARM is called `Dockerfile-ARM32` with the following content:

There’s an interesting bit in the middle where I copied in the `.git` folder. This allows my application to grab the latest git SHA hash as a bit of a version check for the source code. That SHA is made availalble on the assembly’s `AssemblyInformationalVersionAttribute` attribute value.

We can then build the container for my ASP.NET Core application to run on the Pi from my Windows workstation using this command:

docker build --platform linux/arm -f .\Fritz.DemoPi\Dockerfile-ARM32 . /
-t fritz.demopi:4 /
-t fritz.demopi:latest /
-t fritzregistry.azurecr.io/fritz.demopi:4 /
-t fritzregistry.azurecr.io/fritz.demopi:latest

and then push to my remote registry with:

docker push fritzregistry.azurecr.io/fritz.demopi -a

Step 5: Configure Docker on the Pi to run the website

By default ASP.NET Core configured port 8080 for the website inside the container. I wrote a quick `docker-compose.yml` script to run my .NET application with all of the configuration I would need:

To ensure that the SignalR bits of my demo would work, I removed a privacy extension from the Chromium browser that comes with the Raspberry Pi device.

Step 6: Configure the Pi to boot into Chromium for the website

In order to configure the Pi device to boot directly into a browser and my application running in the container, I added a file at `~/.config/lxsession/LXDE-pi` called `autostart` with this configuration:

@lxpanel --profile LXDE-pi
@pcmanfm --desktop --profile LXDE-pi
#@xscreensaver -no-splash
point-rpi
@chromium-browser --start-fullscreen --start-maximized http://localhost/

Additional options and the instructions I started with are at https://smarthomepursuits.com/open-website-on-startup-with-raspberry-pi-os/?expand_article=1 where I learned how to write this script.

Step 7: Prepare a GitHub action

I configured a GitHub action to checkout my code and build in ARM32 format with the Dockerfile established previously.  This would also publish the resultant container to my Azure container registry:

Success!

Summary

As changes are made to the GitHub repository, the GitHub action will rebuild the image and deploy it to the Azure Container Registry. Watchtower identifies the update and automatically stops the existing application on the Pi and then deploys a new copy with the same settings. With a little SignalR work, the UI updates seamlessly.

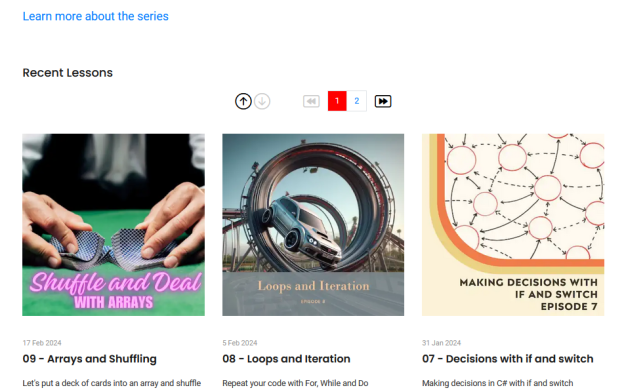
Lesson Pager on the C# in the Cards website

Blazor and .NET 8: How I Built a Fast and Flexible Website

I’ve been working on a new website for my series CSharp in the Cards. I built this website in a way that was easy to maintain, flexible and most importantly would respond quickly to requests from visitors.  I knew that Blazor with .NET 8 had a static server rendering feature and decided that I wanted to put it to the test. I recently published a new lesson to the website and included a web assembly component to allow for paging and filtering the list of lessons I was pleasantly surprised when I saw the performance dashboards on azure showing that it was handling requests and responding very very quickly.

Response times of C# in the Cards after the new episode

In this blog post, let’s talk about how I’ve optimized the website for speed and some of the finishing touches that you can put on your Blazor website to make it screaming fast running on a very small instance of Azure App Service.

Static Site Rendering – Its Blazor, but easier

With .NET 8 there’s a new render mode for Blazor and it’s called static site rendering or SSR. This new render mode ditches all interactivity that we previously had with Blazor server side and Blazor Web Assembly and instead favors delivering HTML and other content from the server to browsers in a high speed manner. We can bolt on other techniques that we know from SEO and website optimization to make this even faster and deliver a great experience for our visitors.

The About page is configured to output a bunch of HTML headers for the SEO folks and the social media pages to be able to present good information about the site.  Notice the headers that are added to satisfy the search engines:

  • a canonical link element that identifies where the page should be served from
  • a keywords meta element with information about what you can find here
  • a robots element that tells the search engine crawlers what they can do with the page
  • open graph and Twitter meta tags that instruct Twitter, Facebook, LinkedIn, Discord, and other sites about the images, titles, and description of the page

That’s fine… but there are two other features to notice:

  1. This is a static page with no data being presented.  I’ve tagged it on line 2 with an attribute to allow output caching for 600 seconds (10 minutes).  This way the web server doesn’t have to render a new copy when its requested within 10 minutes of a previous request.
  2. The images references are in webp format.  Let’s not overlook this super-compressed format for displaying high-quality images.  It might be 2024, but every bit we deliver over the network still matters for performance and the 600×600 portrait picture of myself on this page was compressed nicely:
Original Compressed # Difference
PNG WEBP
450kb 30kb -93.3%

93% savings…  that’s crazy good and means that your browser is not downloading an extra 420kb it doesn’t need.

Data is stored in static files on disk

For this simple website I don’t need a big fancy database like SQL Server or Postgres or even MySQL. For this site, I’ve stored all of the data in a simple CSV file on disk.  That means that I can edit the list of articles that are available and the metadata that goes with them by just opening the file in Excel and writing new content. This means that when it comes time for me to read data about the list of content that’s available I’m only reading from a very small file on disk and I don’t need to worry about any kind of contention. I also don’t need to worry about any service that’s running to deliver that data because it’s only coming out of a small file on disk that’s read only.

In this repository class I use the LinqToCSV library to open and read all of the content from the file into a Post object in the first method, GetPostsFromDisk.  Later, in a public method called GetPosts, you see where I use the in memory cache feature of ASP.NET Core to fetch data from the cache if its available or get it from disk and store it in cache for 30 minutes.  I could probably extend this timeout to several hours or even days since the website doesn’t get any new content without uploading a new version of the site.

The key here is that the meta data about the lessons on the site is loaded and kept in memory.  As of episode 9 of the series, the posts.csv file is only 1.4kb so I have no worries about loading its entire contents into memory.

Don’t forget, in order to add the MemoryCache to your ASP.NET Core application, you need to add this line to your site configuration in the Program.cs file:

builder.Services.AddMemoryCache();

I could add other cache options like Redis to the site, but with how small the data I want to cache is, I don’t need that sophistication at this point.

Pre-rendered Interactive Web Assembly Content is fast… REALLY fast

I wanted to add a subset of the lessons to the front page of the website so that you could see the latest six episodes in the video series and scroll back and forth to the other episodes. This should be an interactive component but I still wanted the home page to render quickly and have a fresh speedy response time as you page through and look at the various episodes that are available. The natural way to do this with Blazor is to build a web assembly component that will run on the client and render data as users click on the buttons for that collection of articles.

I wrote a simple pager component that would receive a collection of lesson data and render cards for each lesson.  Since we already know that the collection of lesson data is less than 2kb in size I don’t have a problem sending the entire collection of data into the browser to be rendered.


When I use the @rendermode attribute in this code, it forces the render mode to web assembly and ASP.NET will pre-render as well as cache a version of that component’s resultant HTML with the home page. After viewers download the Web Assembly content it will hand control over to web assembly and it will be a fully interactive component for them to be able to work with.

Lesson Pager on the C# in the Cards website

Lesson Pager on the C# in the Cards website

Blazor lets me build content to be rendered on the web and I get to choose where exactly it should run. It can run in the browser with web assembly it can run statically on the server it can run interactively on the server if I want it to. In this case running as web assembly gives a really nice usability effect that makes it easy for viewers to locate the content they want to watch.

Compress the Content from Kestrel

By default content that’s delivered from the ASP.NET kestrel web server is uncompressed. We can add brotli compression to the Web server and deliver content in a much smaller package to our visitors with just a few simple lines of code in program.cs. This is something that I think everybody should do with their Internet facing websites:

#if (!DEBUG)
builder.Services.AddResponseCompression(options =>
{
options.EnableForHttps = true;
});
#endif

Add response compression configures the server so that it will deliver broadly compressed content. In this application I wrap it with the conditional debug detection because hot reload does not work with compression enabled.  When we deliver the website to the production web host it will be running in release mode and compression will be enabled.

Optimize all the JavaScript and CSS

CSS AND JavaScript can be minified and combined to reduce the number and size of downloads for this static content that makes our websites look good.  For this website I installed and used the WebOptimizer package available on NuGet.  My configuration for this looks like the following:

This script bundles the CSS files that were delivered with my website template and minifies the one JavaScript file that I manage with my project.

Set long cache-control headers for static content

The last thing that I did was set long duration cash dash control headers for static content like images CSS and Javascript files. This is easy to do with just a few more lines of optional configuration when I configure the static file feature inside of ASP.NET Core:

Summary

This website’s been easy for me to build because I can rely on my normal HTML skills and the plethora of HTML templates and CSS libraries out there to make my website look good. Blazor helps me to make it interactive render quickly and grow as I add more content to it. my cost in interaction with azure is minimal, as I’m using a Basic-2 instance of Azure App Service running Linux to deliver this site.

KlipTok logo over a bar graph in a PDF

How to watermark, annotate, and digitally sign a PDF with IronPDF

Previously, I shared some code that demonstrated how the new PDF report feature was built for KlipTok.  In reviewing the feature, I wanted to give it a little more value.  When you read a report generated from KlipTok, I want you to know that it was genuine and accurate data.  I started researching the ability to stamp or put an authentic indicator into the report so you could tell it was a real report from KlipTok.  I found three techniques with IronPDF that were each amazingly easy to implement and gave different experiences when reading the PDF.  Let’s take a look at each technique: watermarks, annotations, and digital signatures. Continue reading